I apologize for the inconvenience. Could you please apply C4D standard materials and Corona materials to the object, then sync it with D5 to confirm whether these are properly recognized in D5?
Additionally, could you describe your workflow for the gradient texture and the style you intend to achieve? This will help us troubleshoot the issue more effectively.
Please export the file as a .d5a file and import it into D5 to check the mapping results. To assist us in testing this issue on our end, kindly send the C4D file to us at support@d5techs.com and include the tag “Anthony_Forum” in your email.
I’m working with Workflow C4D R24 and trying to export to D5.
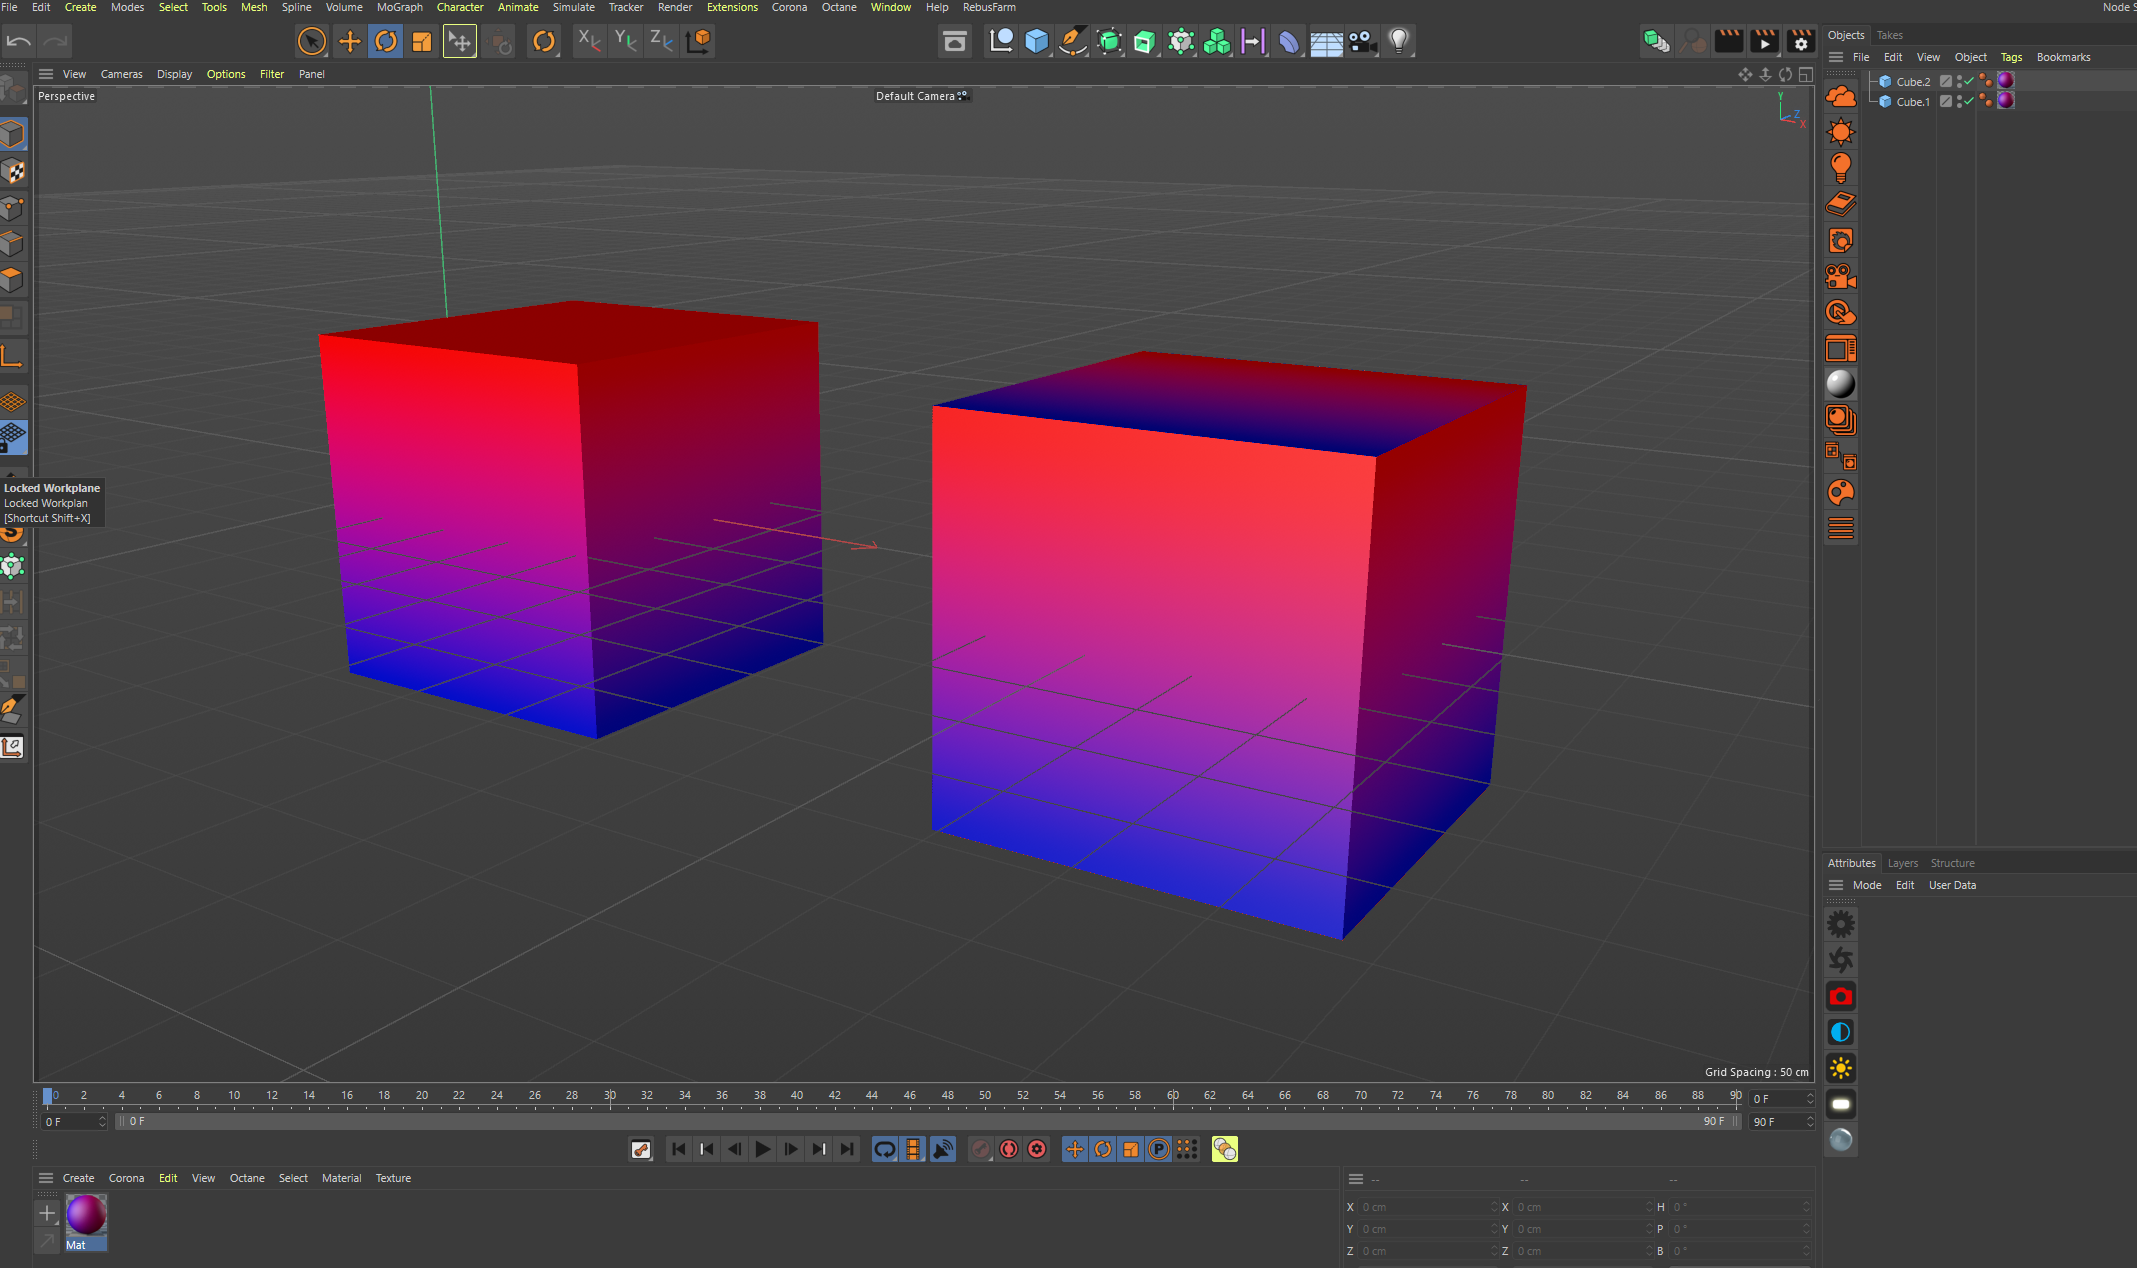
I’ve created a standard material in Cinema 4D, but the gradient isn’t applying correctly to the entire object.
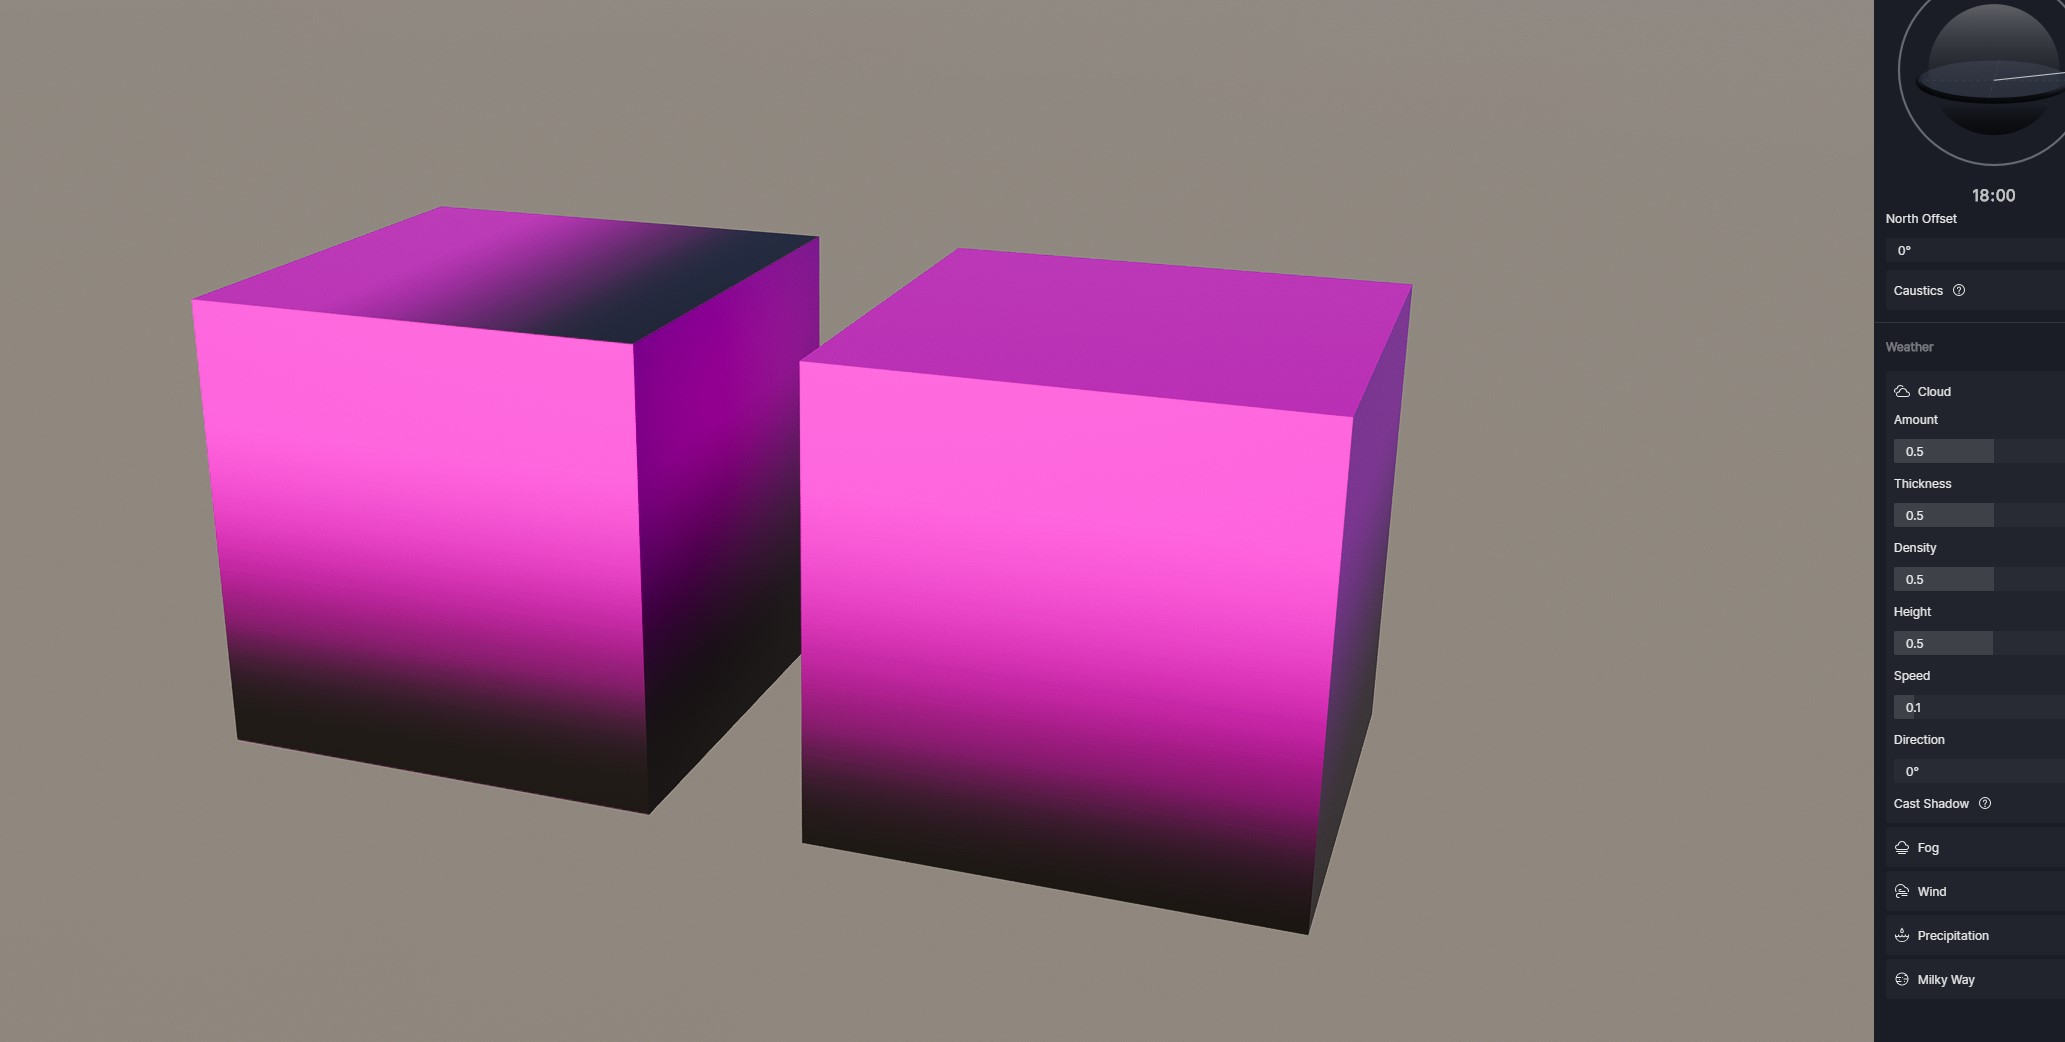
The right side appears purple in D5, which I believe may be due to a sync issue between C4D and D5 since the mapping tools in D5 are limited to U and V options.
I apologize for this issue. May I know how this gradient material was generated? Was it by using or inserting a PNG or JPG on the 3d Modeling software? If so, please try to insert this gradient JPG or PNG in D5 Render.
I originally made the gradient inside C4d and transfered it across and then I tried to make it in Photoshop and input it straight in the D5 Map channel as you have shown but still to no luck.
My goal was to start the gradient from the bottom to the top as you can see in my viewport but neither of the methods worked. Both the front and the side face seem to act differently.
I have found something online which can somewhat fix the issue by applying a material tag inside the software to lock the mapping but it requires me to make the object editable(fixed) which I like to avoid as it means going back for client changes is a much longer process.
hi Nathan.
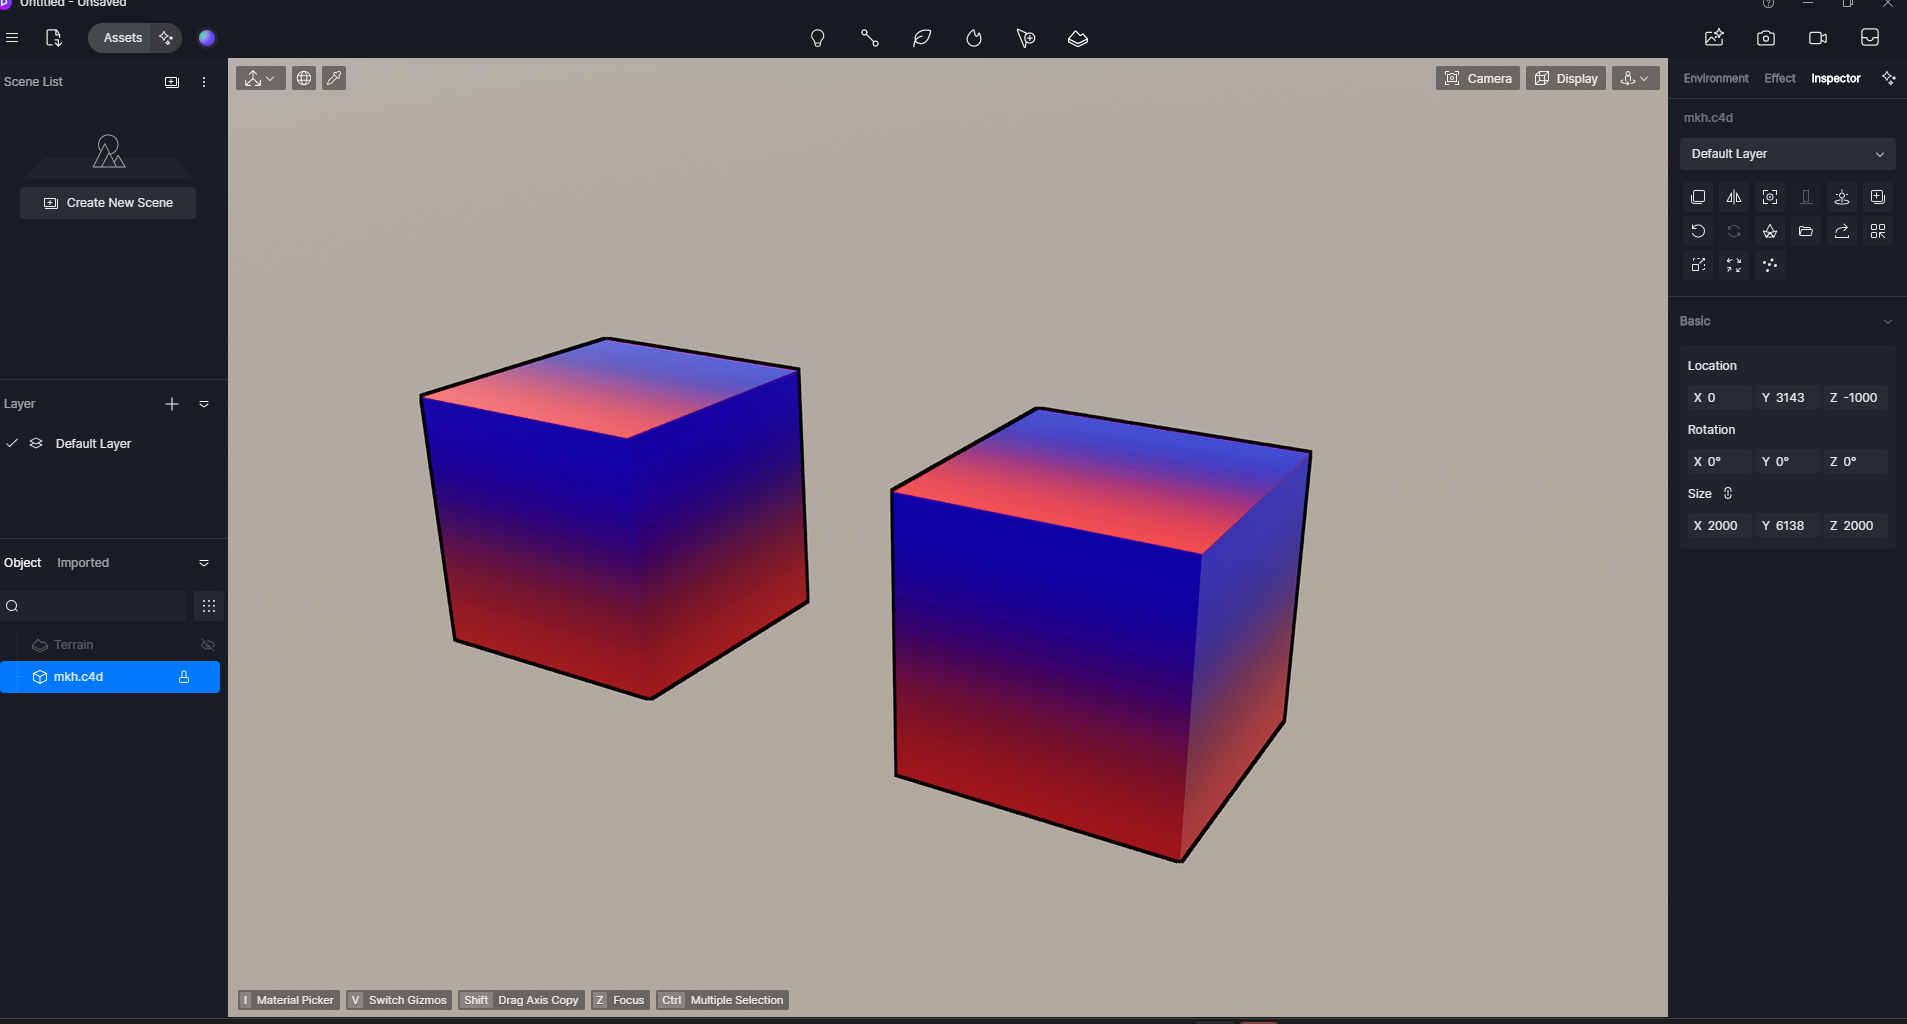
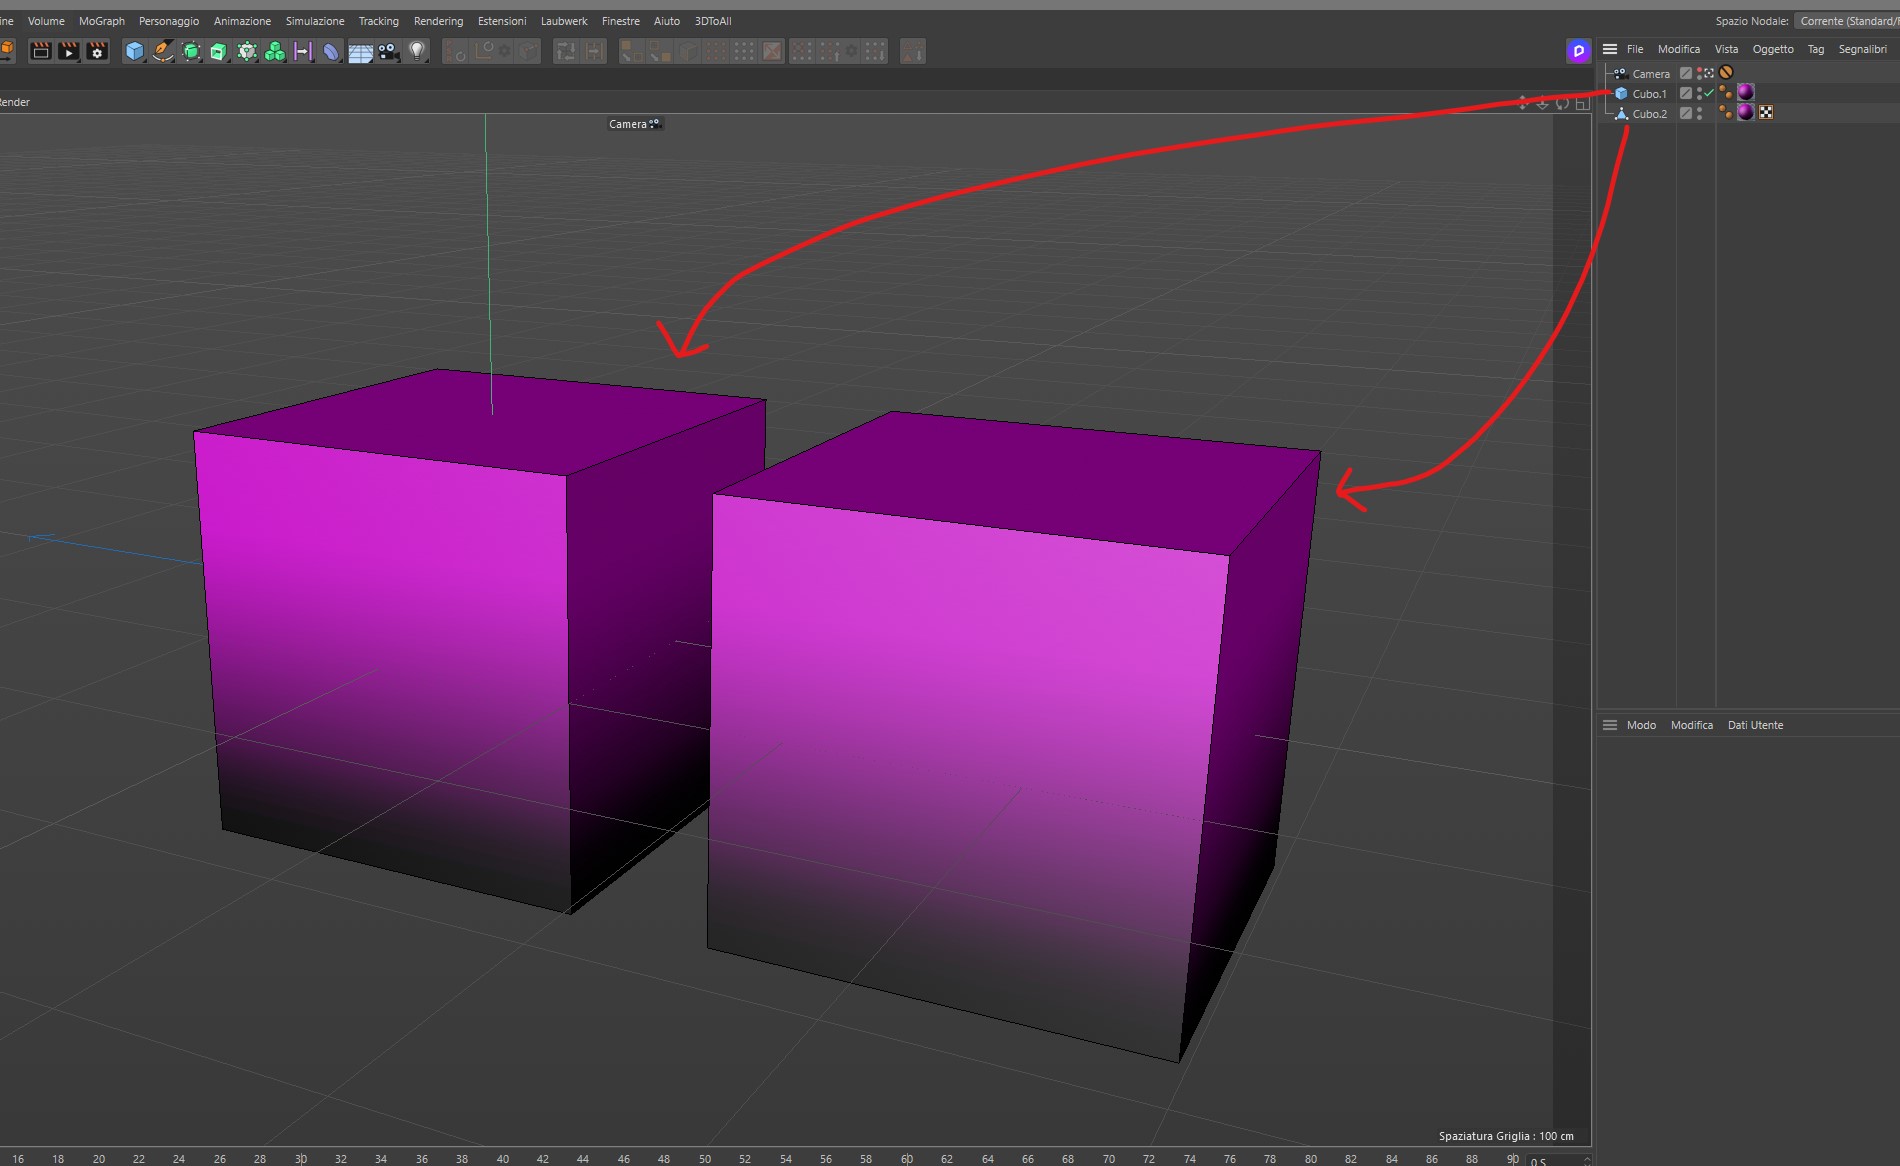
In Cinema 4D you have to first explode the cube and then apply the correct mapping (in this case I applied cylindrical mapping) and after that I created the UVW.
The left cube has cylindrical mapping (correct in Cinema 4D but wrong in D5) The right cube correct in both Cinema 4D and D5.
hello.
the simple cube primitive object i almost never use it, i make it editable to modify it.
But objects created with splines (example) I do not make them editable. D5 manages to keep the mapping assigned in Cinema4D. Maybe some situation will not be good for D5, but few cases I think.
For this example, the mapping did not work when I tried to align it in C4d and sync it over to D5. I had to import it into SketchUp and map it in there as it seemed to work. Just a shame it’s not seamless with C4D.