All characters and animals are over exposed

Do you notice that all characters and animals are over exposed using default exposure ?

Using exposure -0.3 they looks good but all other objects are too dark after that

Scene exposure is not consistent among objects. I don’t know how to play with that using default characters brightness.

Generally characters looks good after changing their brightness to 50 value from default 70 but there is no way to do the same for animals.

ohh , i didnt know about this yet. i did some exteriors with peoples but i didnt faced this,
try sun intensity to 0.3 or 0.4 and radius to 5 might help.

Yes, lowering Sun value can help also highlight local exposure to something like 0.5 but it change light globally.
I really don’t know why only these sort of objects were prepared using probably different light conditions than all other sort of objects which looks good using default values.

It looks like someone did mistake while setting default brightness for people and animals to 70 in Asset Library. Brightness set to 50 ( exactly on middle ) resolve this issue but not for animals ( missing brightness option )

its valid query, D5 team will look forward . as u know sat and sun is off for them. ur query will be addressed on monday. and options for peoples also vary, some have cloth change / some have skin tone and some dont have any option.

Please see first on the left has brightness set to 50, on the right default brightness 70 :

Changing Sun or other effects have impact on all scene and other models which looks good. Characters and animals are overexposured no matter if they have black cloth or are naked.

Problem is that using path tools we don’t have access to their materials to change their brightness.

i think they kept character textures keeping in mind for night views appearance. path tool is not like lumion, in lumion when u make custom path animation for people and car, the spawning of objects always have starting time at first frame. D5 spawning is random and not at start, i think im unable to explain this, i think u got what i mean.

I think that D5 doesn’t have any problem with lighting, it has very good light transportation even for night shots to make part of the models overexposed while the rest stays at normal exposure. It cause scene inconsistency like here.

As for path tool I mean that we don’t have possibility to change material/brightness of objects inside path. The same is for animated people - no way to change their brightness.

It would be no problem if D5 support ACES where these overexposed parts would be intelligently restored or people have implemented diffuse EON roughness model.


Another ambient test, 70-bright ladies are too bright compared to the lady using 50 brightness. No other lights here :

They are animated so even no way to change theirs brightness.

Hi @Smolak

I’ll be pasting some important information from our user manual on how Exposure and autoexposure work. What effects can each of the parameters in post-processing achieve? | User Manual

Auto Exposure in D5 Render automatically analyzes image brightness and adjusts it to a balanced level. This mimics the human eye’s natural adaptation to changes in lighting (e.g., moving from a bright to a dark environment, or vice versa) or the functionality of a “dumb camera", which can quickly find a suitable exposure level for the individual using it to base on.

  • Exposure Compensation: allows users to manually fine-tune the overall brightness while Auto Exposure is active. This enables users to brighten or darken the picture as needed, making it easier to achieve the desired visual result with automatic exposure engaged.

Hence, when adjusting the exposure manually, pay attention to the amount of information in the scene and try to avoid large areas of “overexposure” or “dead black” in the image.

  • Other post-processing options are also present, such as Shadows, Highlight, Shadow Local Exposure, and Highlight Local Exposure, which may be relevant in adjusting the brightness and how the characters are being affected.

This is the test i did on my end, based on the images you have provided. There’s no replication on my part, where the characters are taking the light differently. If you can share to us your environmental and effect settings or even the file itself, then that would be better.

These are my settings:

Hi @Clov,

Thank you for deeply explanation. I will test more but I spent many hours to test many settings and yes there is way to lower their exposure but at cost of destroying all other scene objects that are correctly exposed except people - especially animated ones.

Only one way that works perfectly on strong sunlight condition is lowering their brightness back do 50 from 70. Just like other objects probably have because they are perfectly calibrated.

Main problem for me is that animated people doesn’t have any brightness settings.

These two are animated :

There is need to drastically change Effects options to make them acceptable but at cost of all other scene elements :

Of course stills can be easily repaired in post but animations not.

Quixel was a company which have greatest library of 3D models. They had library of all sort of objects except characters. All of them were standardized with the same parameters like brightness.

D5 has great library too but if you put your characters and pets among other objects you will see that they way too bright. This is more visible on strong clear day sunlight. And currently many of them doesn’t have any option to reduce this.

Lowering Sun strength cause that we loose translucency effect on plants. Changing Effect parameters affect all scene - mainly less contrast.

Too bad that object groups and layers doesn’t have it’s own brightness/color corrections. It would be great for have freedom on creating exceptional stuff even if something in asset browser doesn’t fit to crazy scene lighting condition.

Hi @Smolak

Your insights are valid. You can submit another suggestion in the Ideas and Requests portion, and I will be forwarding this suggestion further to my team.

I’m still unable to replicate the issue that you have mentioned about the assets having different brightness/exposure. If you could guide me on how to reproduce it on a screen video recording, that would be best.

Hi @Clov,

To replicate this please use other objects lika plants with characters and you will see how they react on Sun intensity compared to other objects. Characters are more sensitive for Sun intensity than all other types of objects. They looks overexposed even at Sun intensity 1 where other nearby objects have much more margin of brightness to be overexposed. You can crank up Sun intensity above 1 to have greater leaves translucency effect without overexposing them.

Please look how much there is need to lower exposure to have people not overexposed and how dark is surround after that :

If there is need to lower exposure of whole scene to have one too bight character not overexposed that’s mean that this character has wrong brightness by default compared to other objects.

If characters have brightness scale 0-100, 50 is the middle. And they looks good. But you have set their brightness to 70. Probably because they was too dark on low light conditions using old GI method. While now D5 use path tracing they looks perfect on brightness 50 in every lighting condition.

I will not have any issue for them if there would be possibility to lower their brightness but I found that most of the characters especially animated have this option disabled.

This is good one :

People are as bright that they produce strong glow and lens flare effect like highly polished metals :


Another test using default Sun intensity 1 with Sun behind camera :

Reduced Sun intensity - they still way too bright compared to surroundings :

After many hours of investigation I found solution !

I will describe it here because many new D5 users like me most probably had and will have the same trouble.

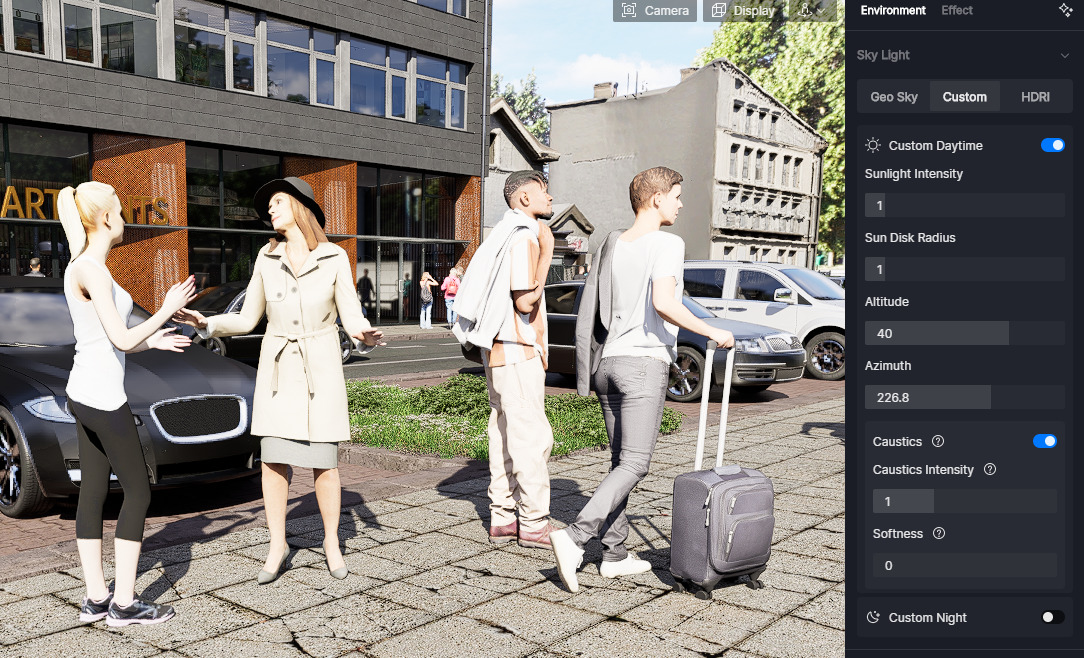
All of the D5 objects and materials are creating using flat lighting curve and neutral Sun strength which is good

image

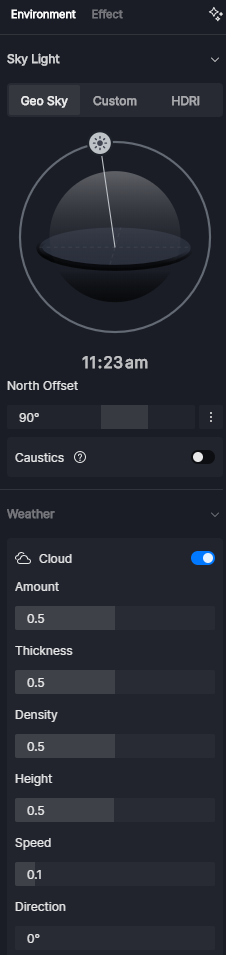
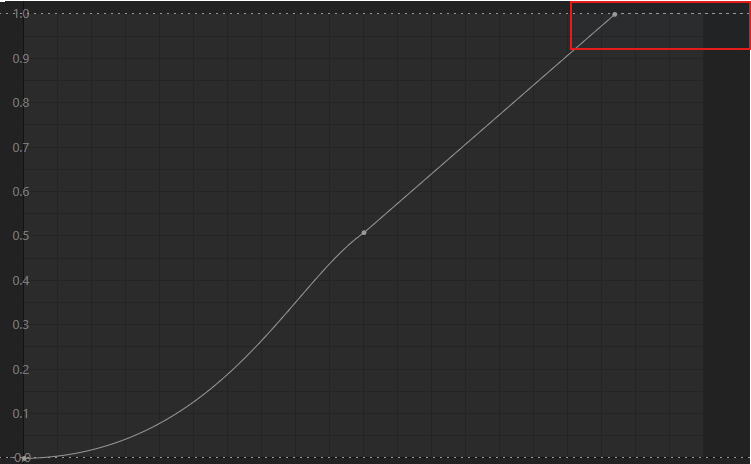
But by default D5 lighting curve looks like that

image

It create interesting effects using most of the lighting conditions except clear day sunlight especially when Sun is behind camera and objects are directly exposed to Sun.

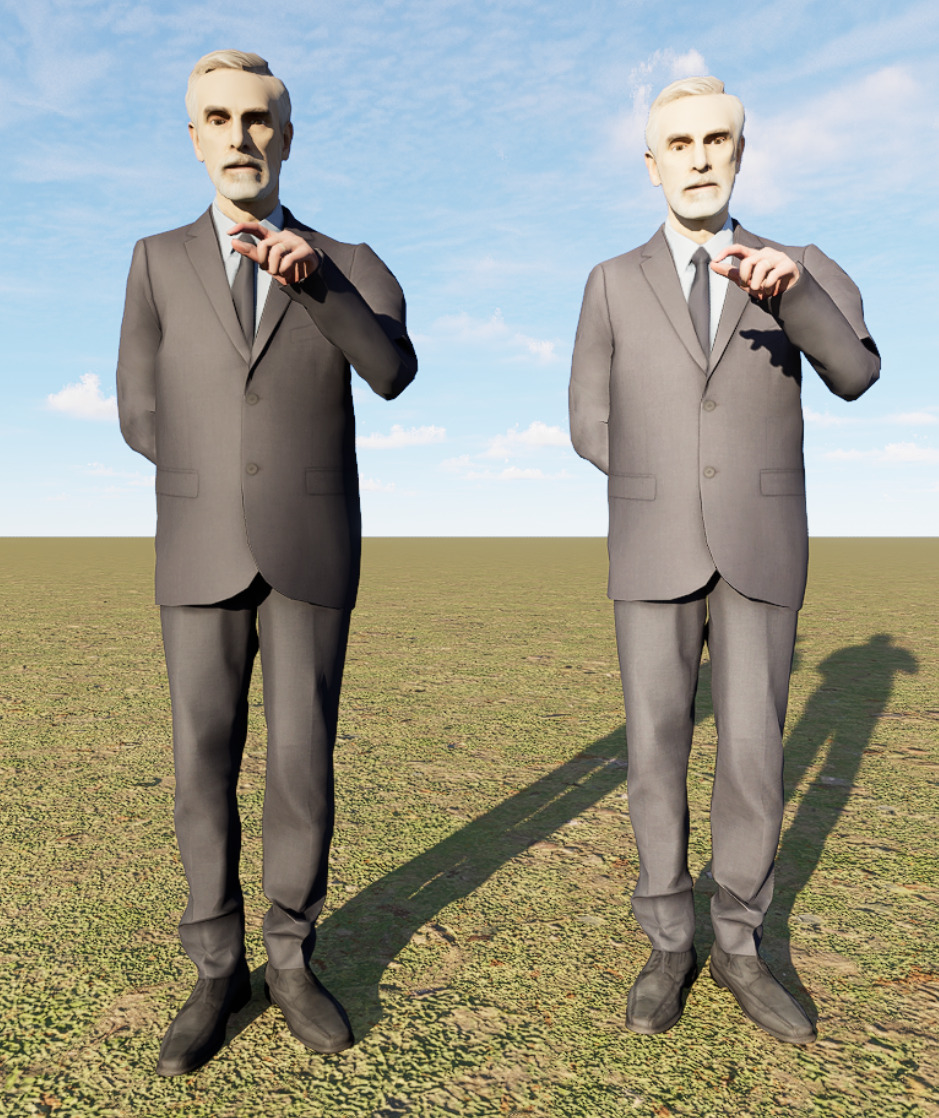
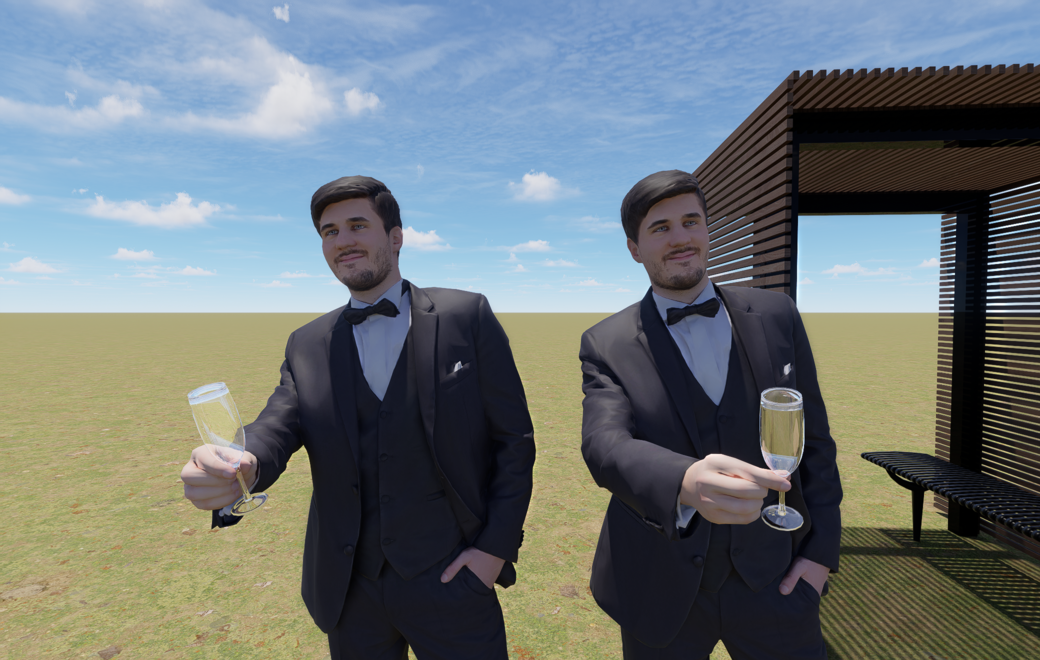
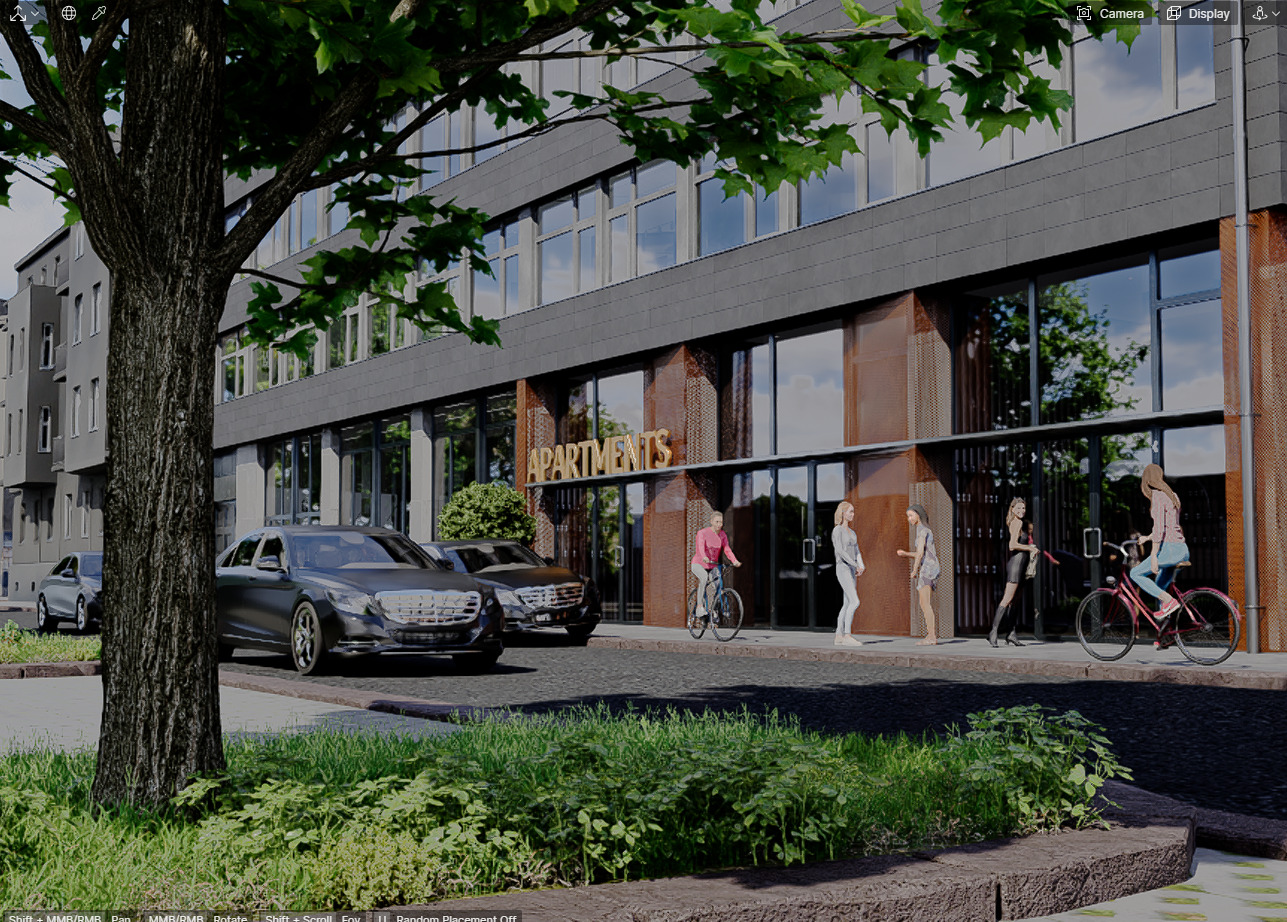
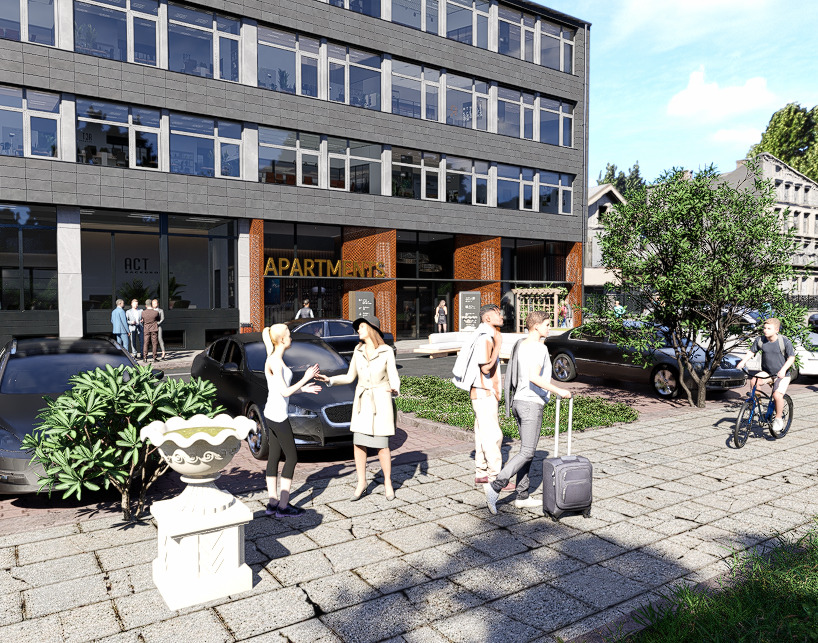
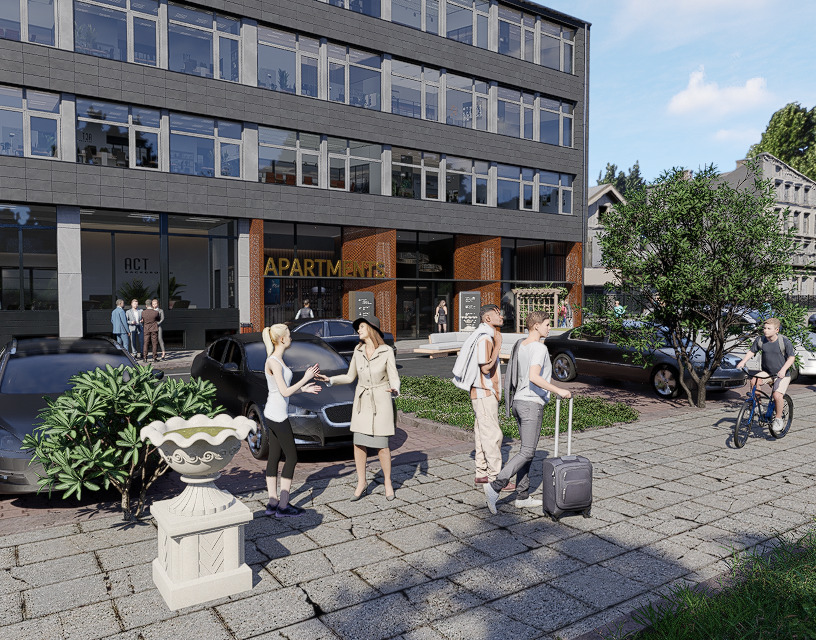
Using default settings we have this :


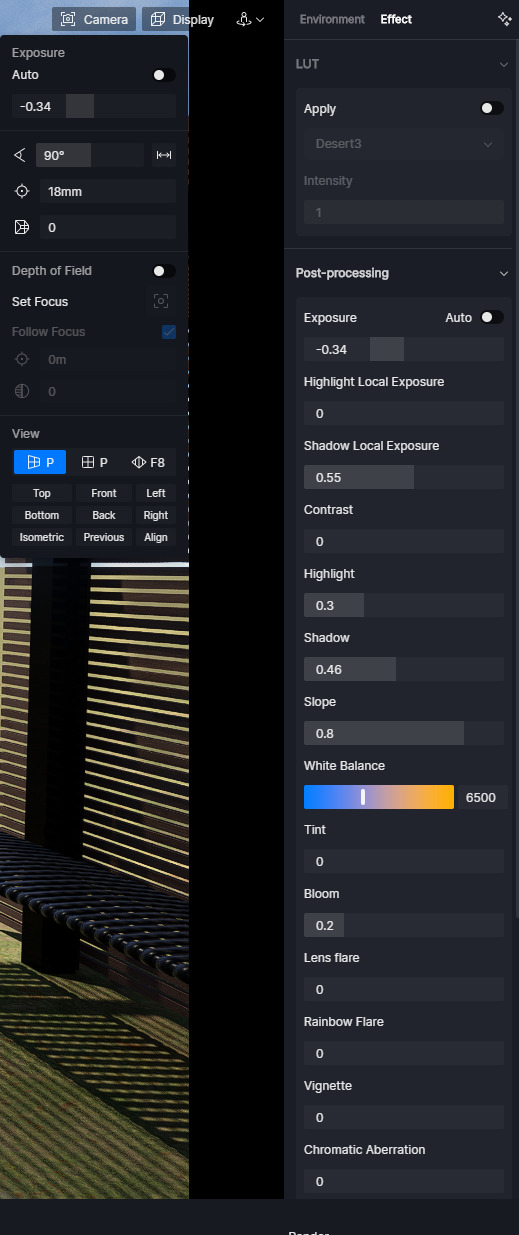
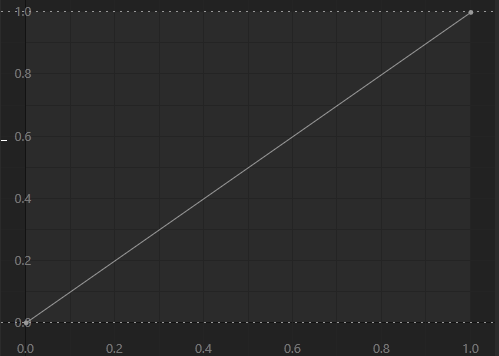
If we want object to looks like creators did them we must flatten lighting curve to linear using Effect Slope parameter like 0.5 from default 0.8 but I found that 0.4 is better

image

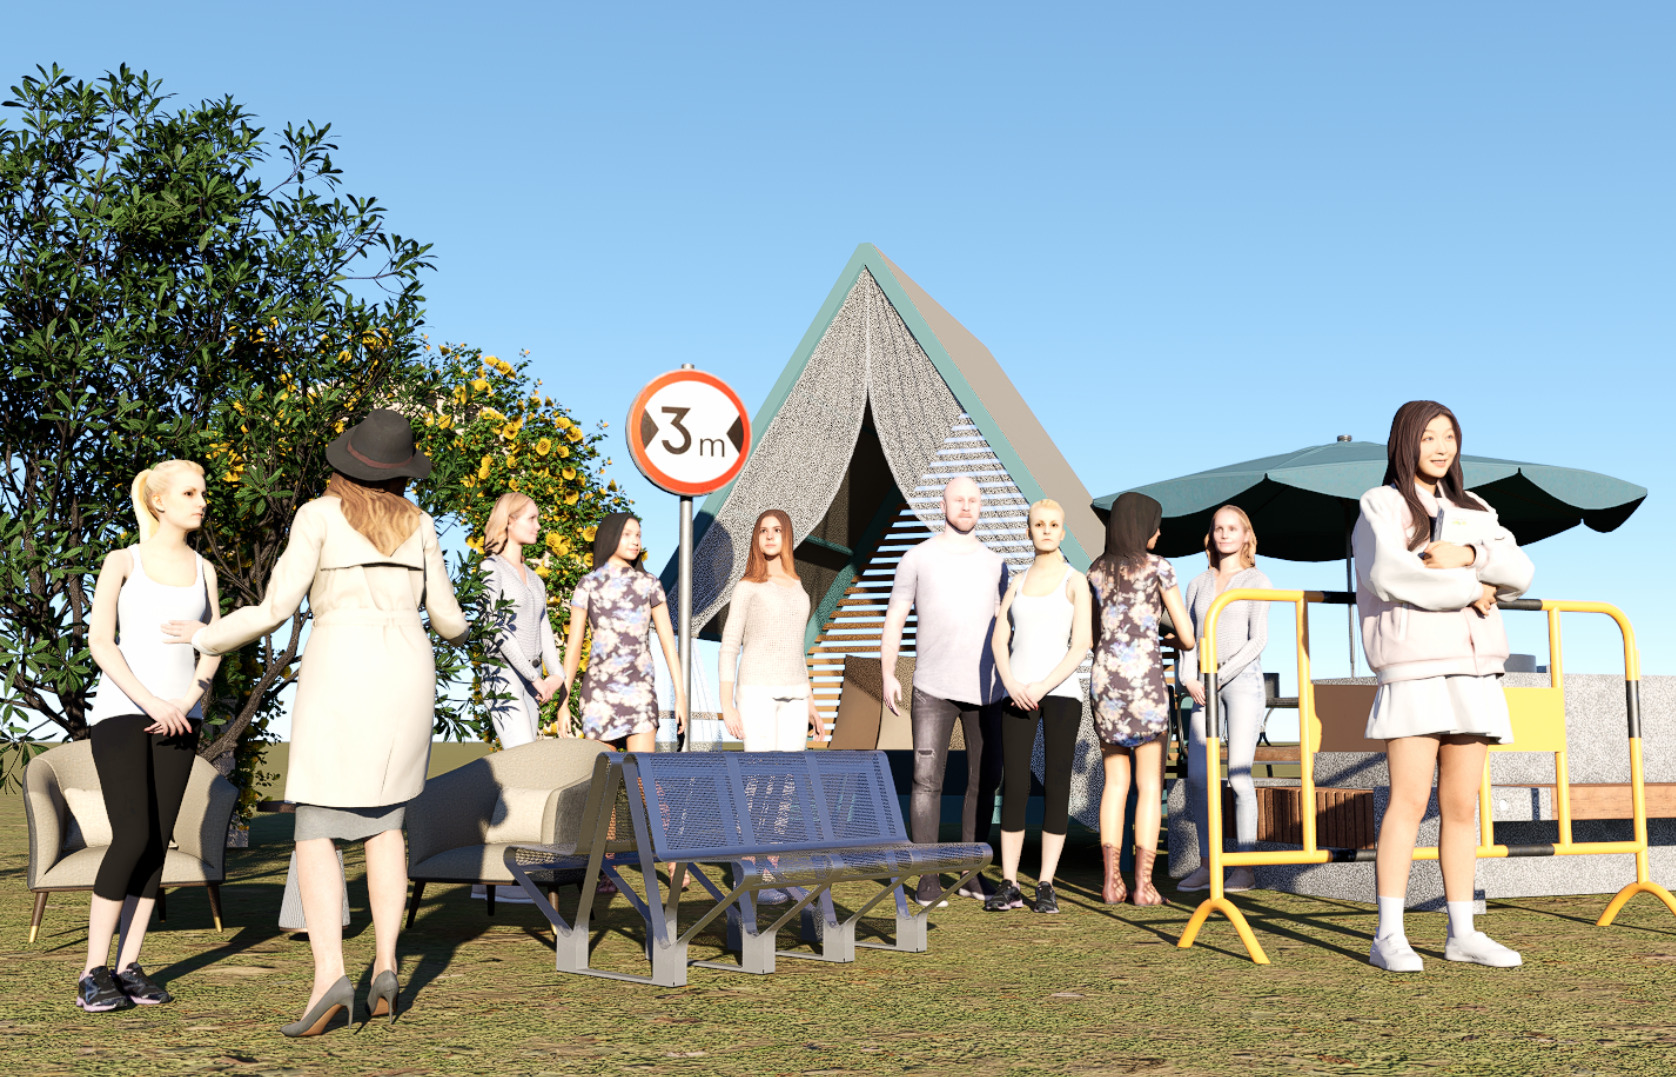
Unfortunately Slope works strange because it also move up lower part of the light curve

image

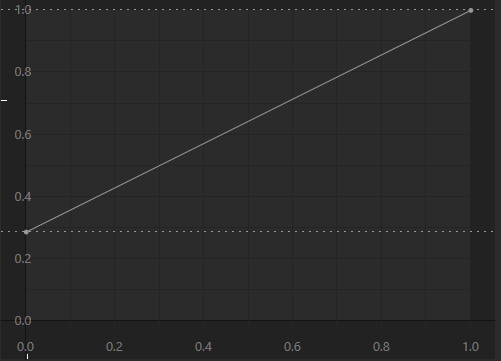
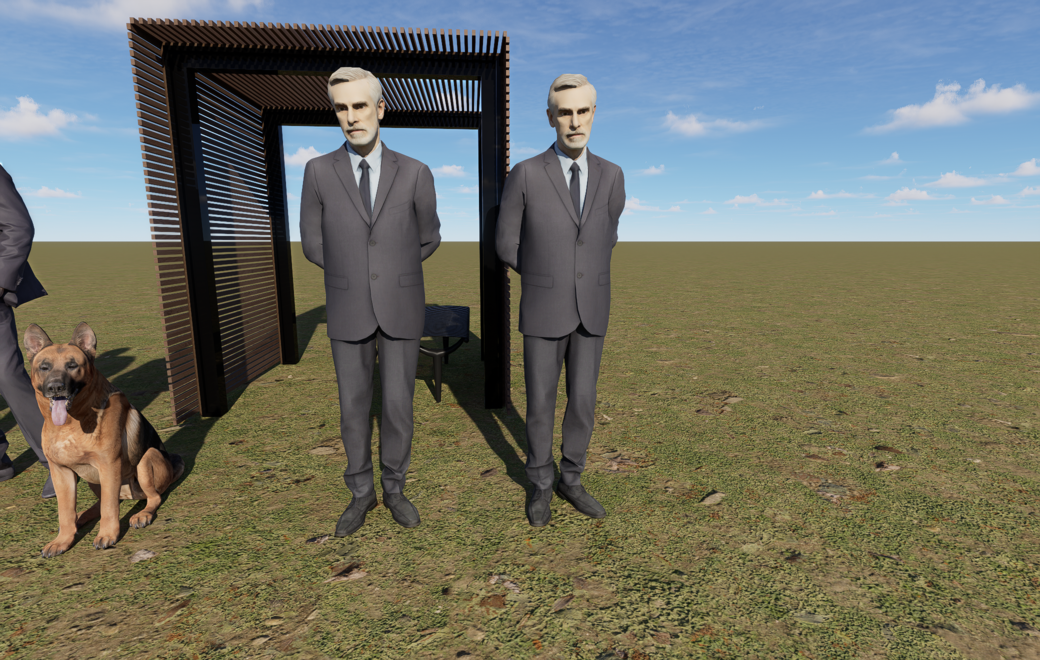
So we lost shadows and image looks badly washed without contrast

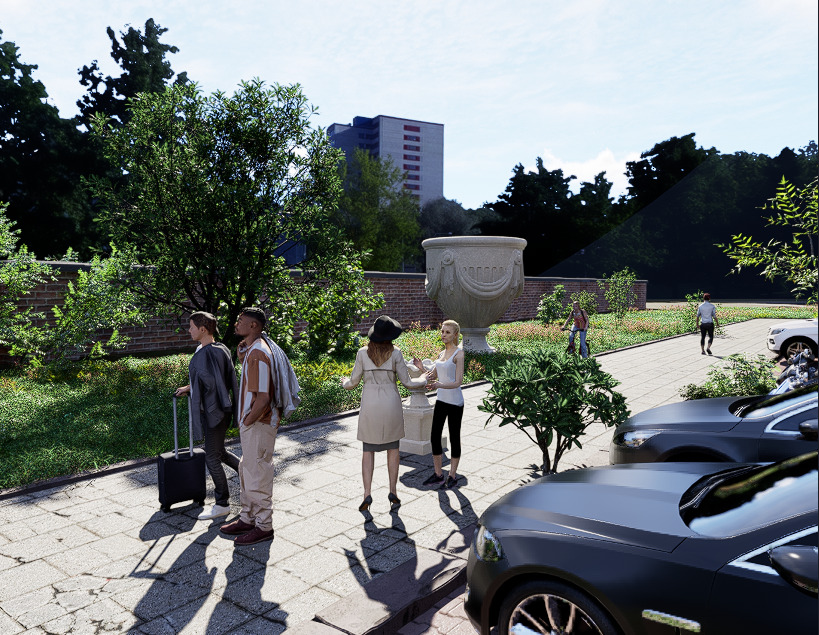
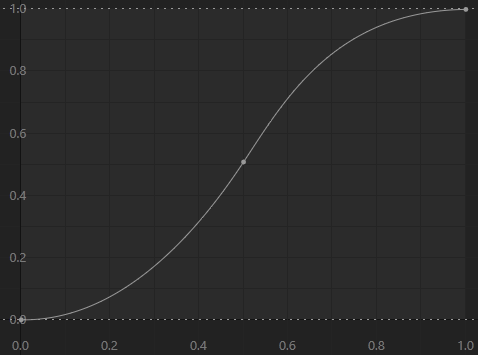
Using Shadow we can move it down and it will looks like that

image

image

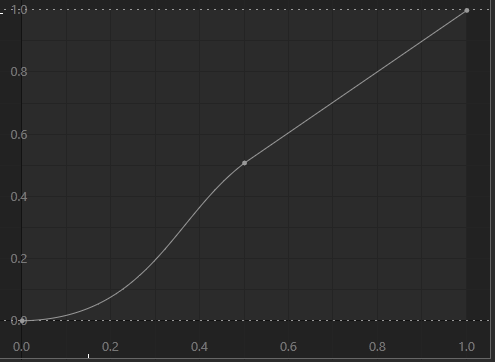
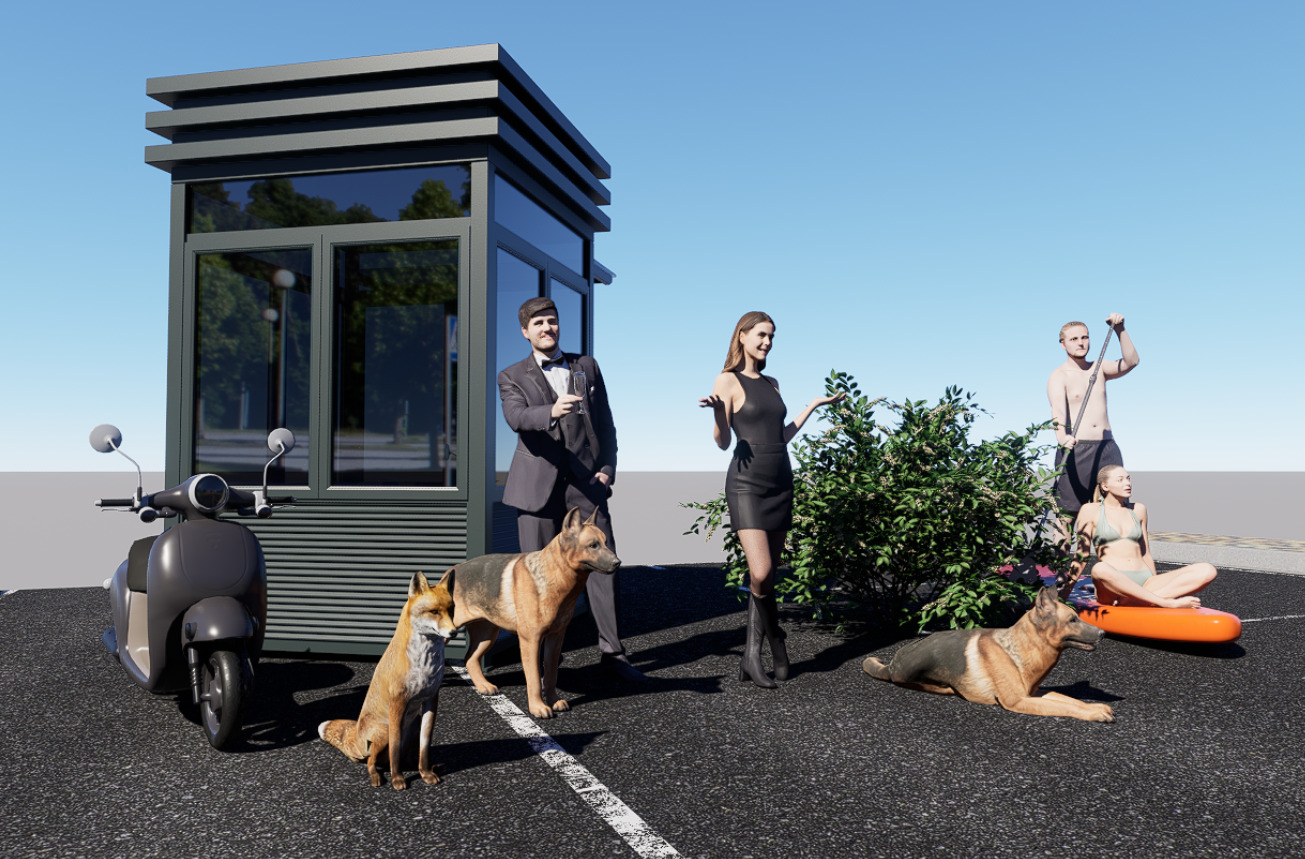
After that we magically have this :


There is also way to tweak more using Contrast or local exposures. There is no need to touch Exposure at all. It completely doesn’t works like in Photoshop where over-exposured parts become not exposured

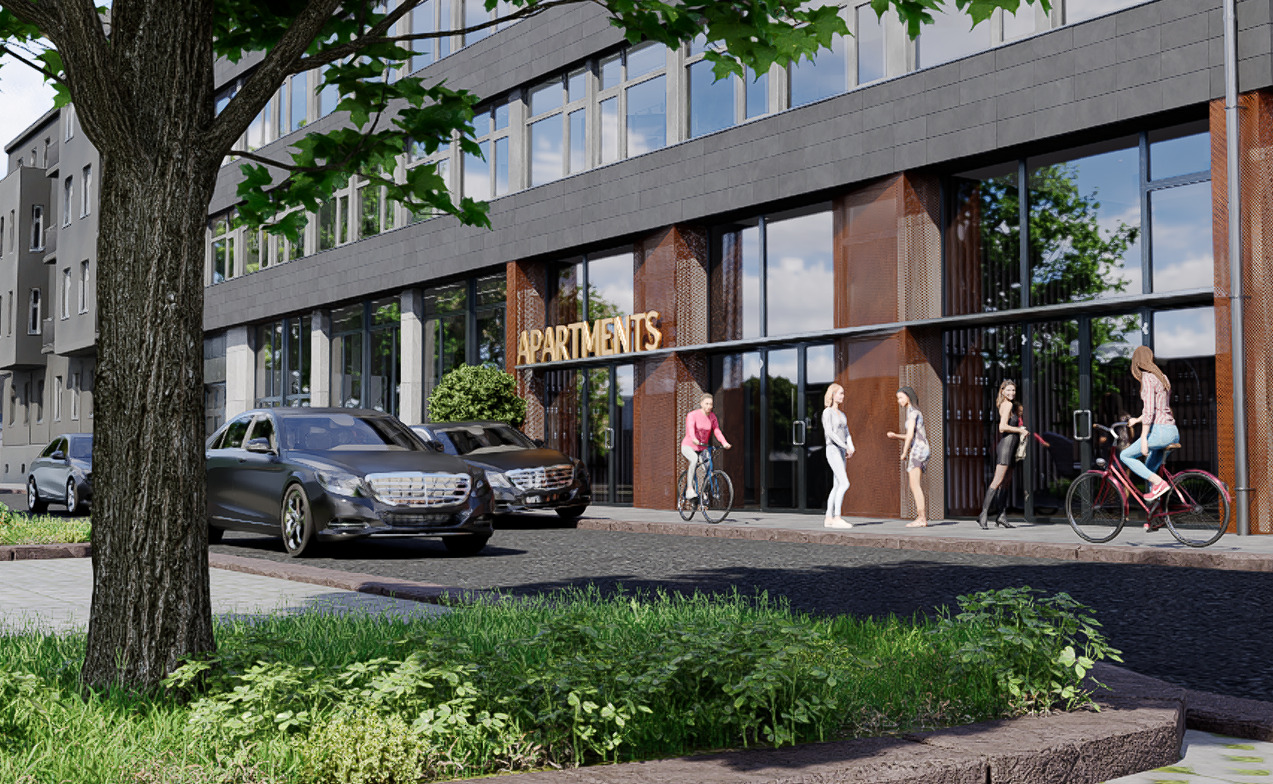
But this is not all. After that we still doesn’t have visible specularity or translucency effect on leaves or it is flatten. This is not visible on attached low-res images.

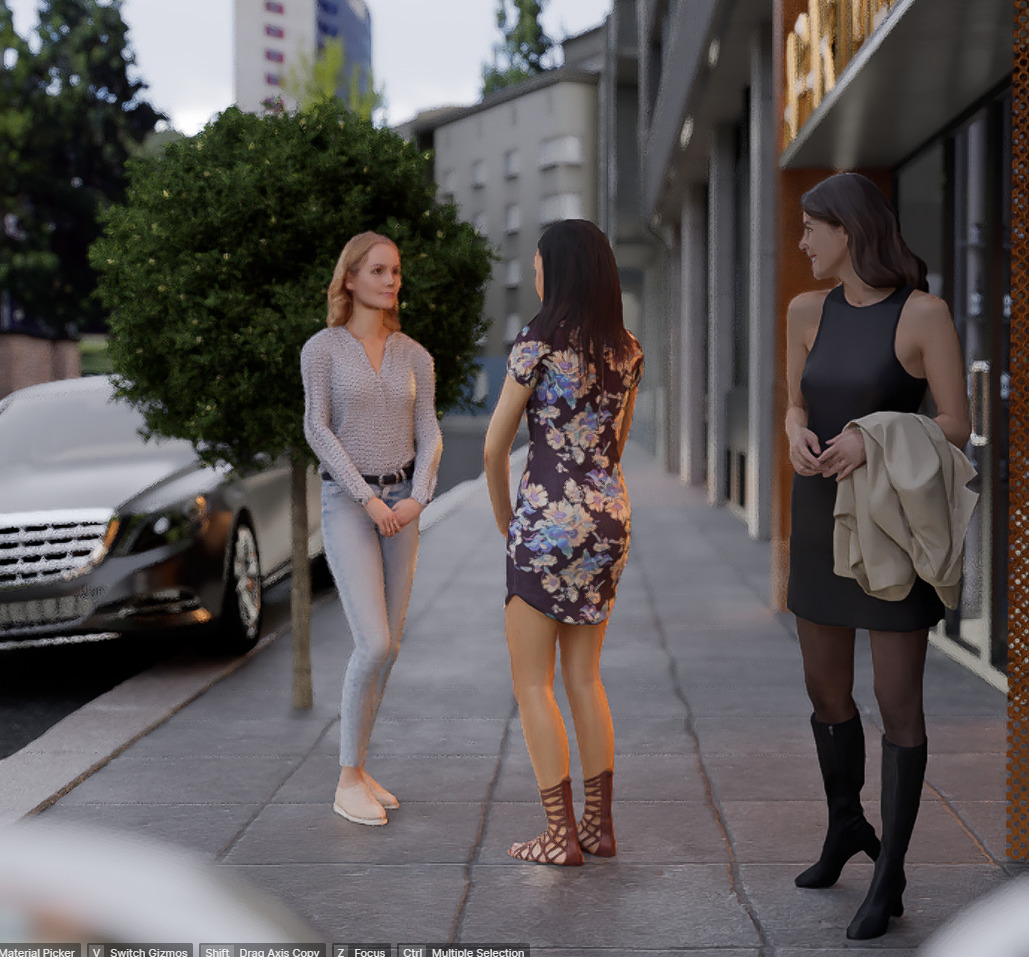
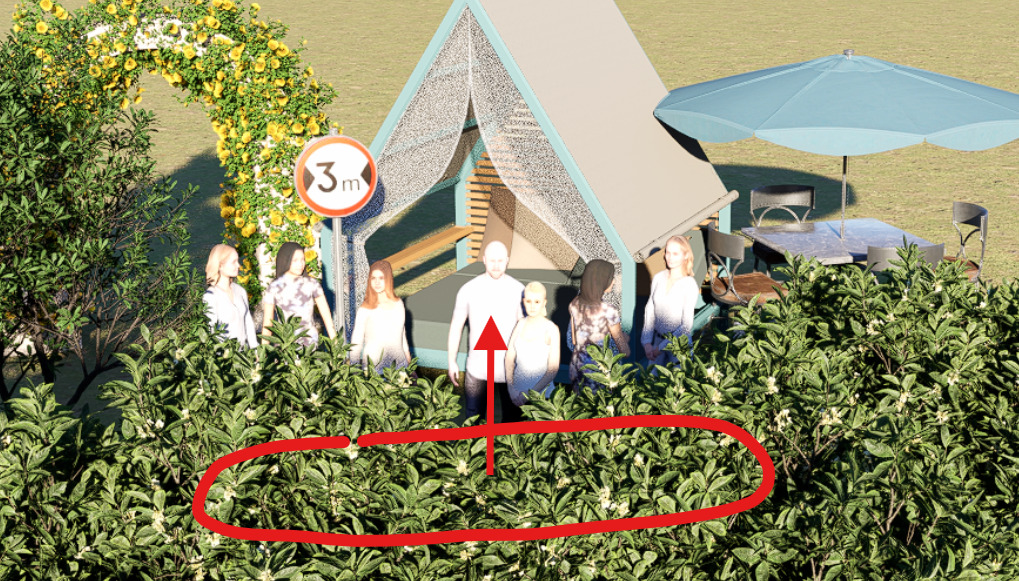
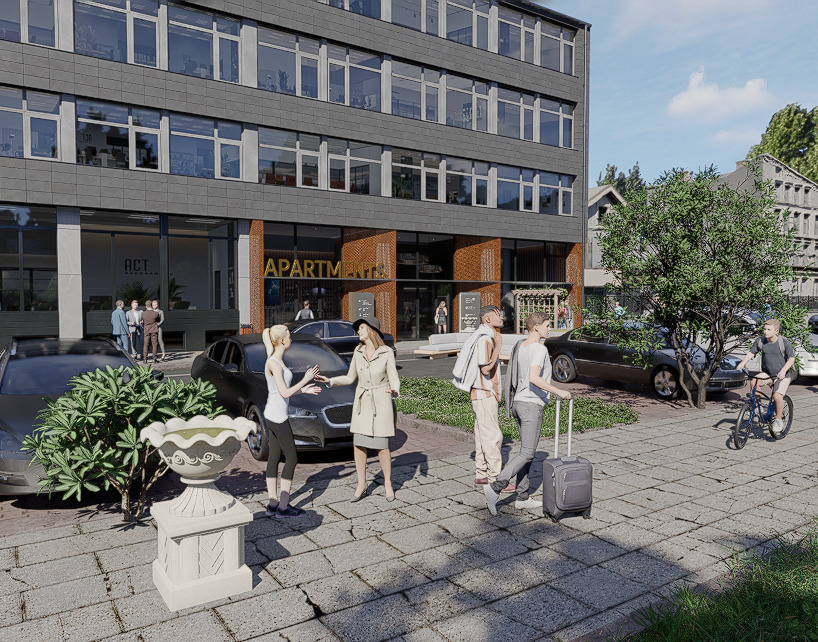
Finally I found that default Sun intensity value is too high. It create clamping effect after using Slope parameter just like moving shadow area up :

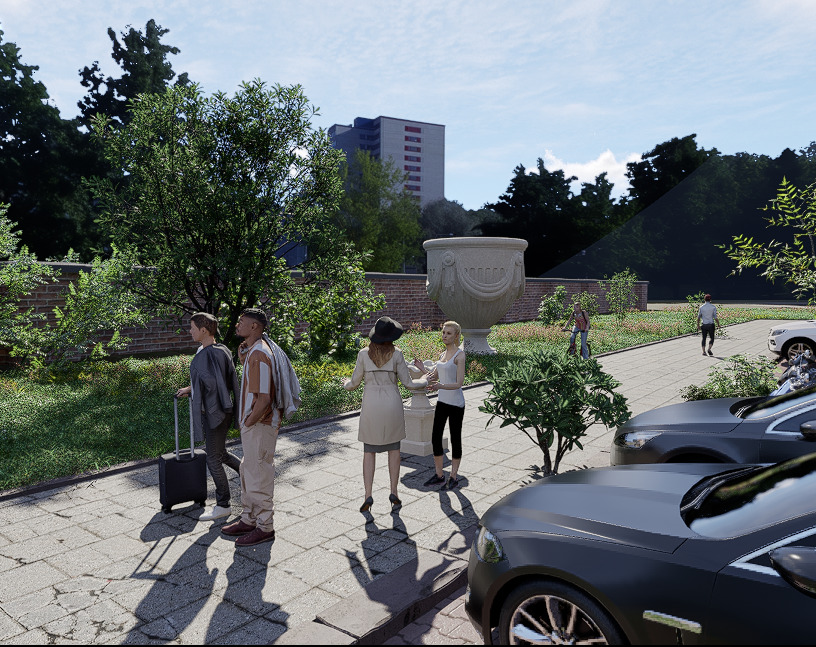
But when we lower Sun intensity to 0.5 it will be back to fully linear on bright parts and all specularity on materials is again visible without loosing shadow contrast :

To sum up :

Slope 0.4-0.5
Shadow 0.7-0.75
Sun 0.5-0.7

and everything will looks good even using other weather conditions.

Thank you for watching, good night :slight_smile: